|
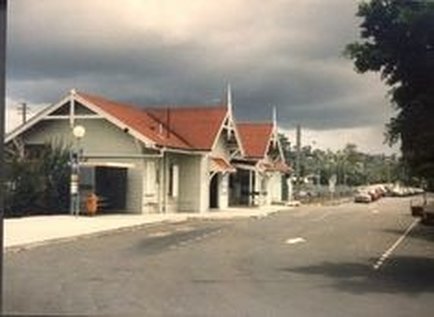
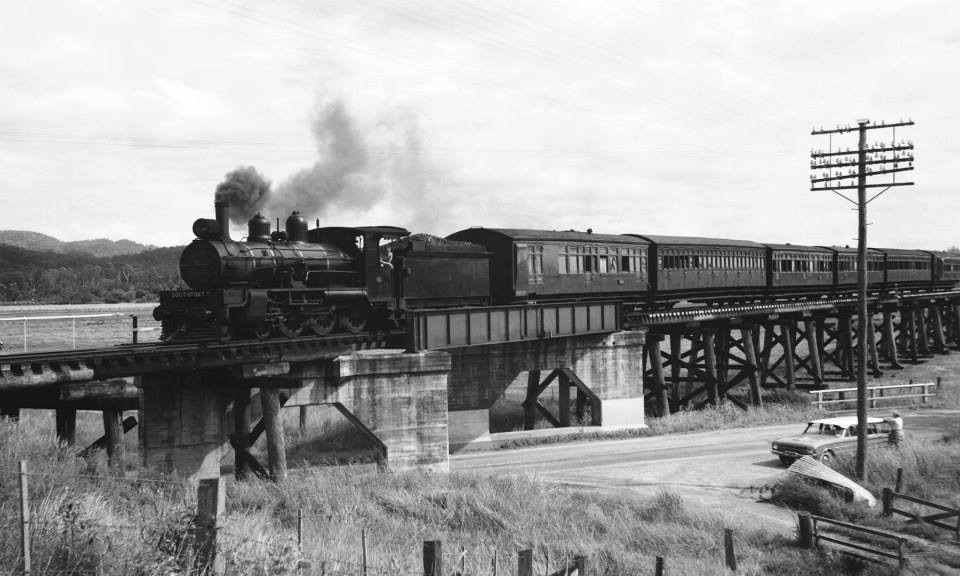
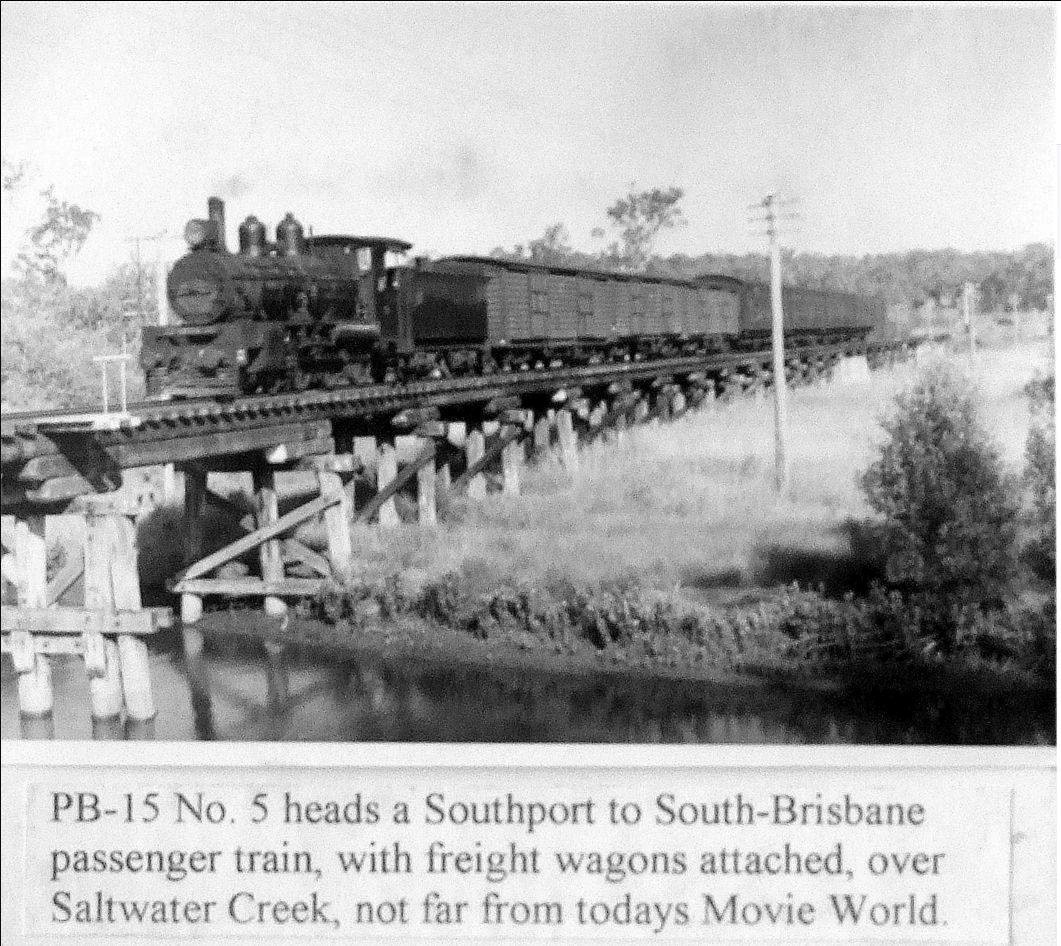
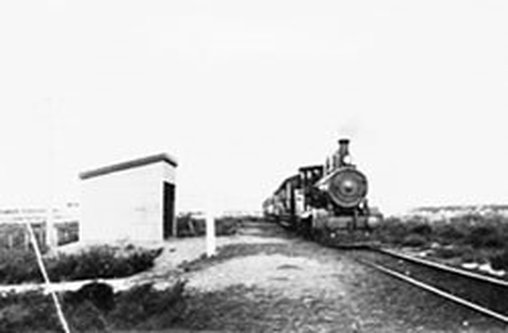
The South Coast service was a slow one, with maximum speeds reaching 60km/hr in sections and a trip from Brisbane to the coast coukd take 3 or more hours. Just like elsewhere throughout the world, the advent of cars and trucks destroyed the service. However when the railway was closed, the roads could not cope with the volumes of traffic and it was not unusual for a 3 to 4 hour trip to the Gold Coast on the weekend. The new Gold Coast railway alignment straightened many curves and with new environmentally friendly rolling stock, speeds of 120km/hr became possible. These days it takes about an hour and fourty minutes to get to the Brisbane CBD from Varsity Lakes, which is exactly the upgraded service the Gold Coast required. The alignment the steam trains ran on could never be practical for today’s transportation service. The closure of the South Coast railway was a necessity, even if the new railway was slow in arriving. The trains depicted are a PB15 locomotive and Evans cars. Photo above left- Outside the Beenleigh station. Soudan St used for station access |
|
Beenleigh
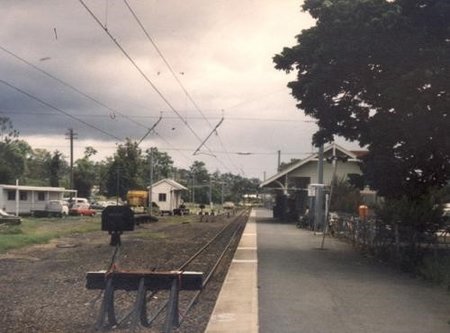
Original Beenleigh station 1985 single line, terminating, 5 ways opposite direction towards camera. New alignment graded lower to pass under 5 ways intersection
|
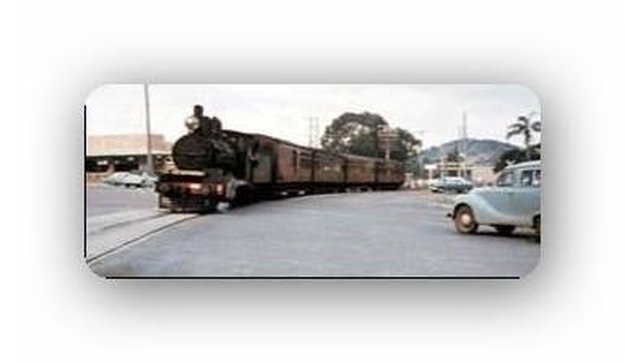
Train crossing 5 ways intersection at Beenleigh heading north. Will approach station after intersection
Stapylton
Stapylton
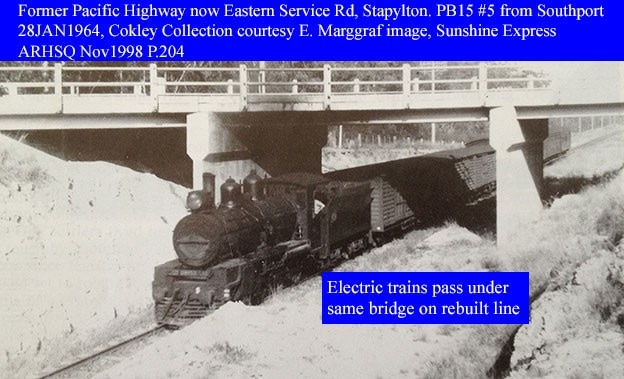
Pacific Hwy at Stapylton. Existing Gold Coast railway alignment passes under this bridge. The service road bridge has been upgraded. Opposite industrial area eastern side of the motorway
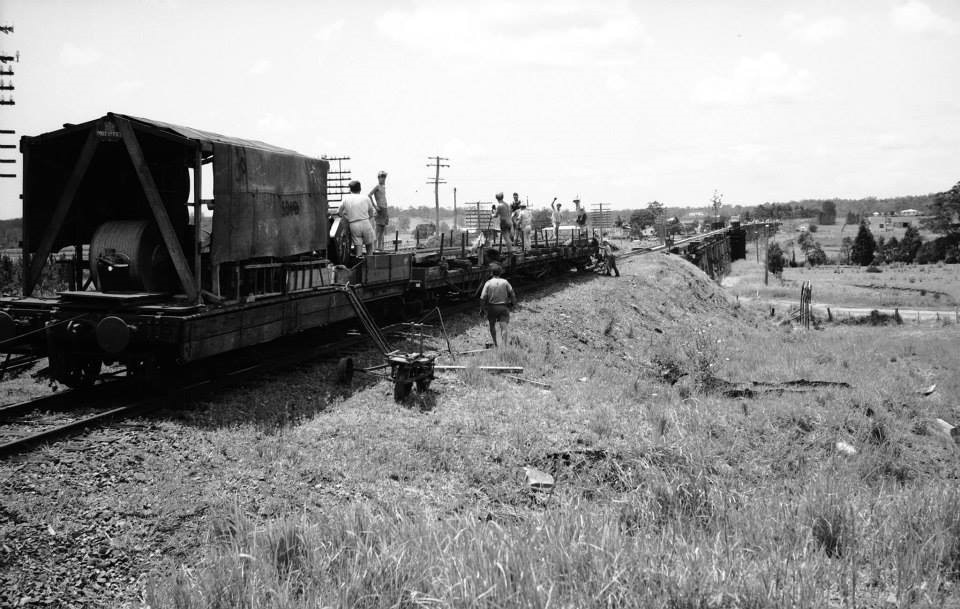
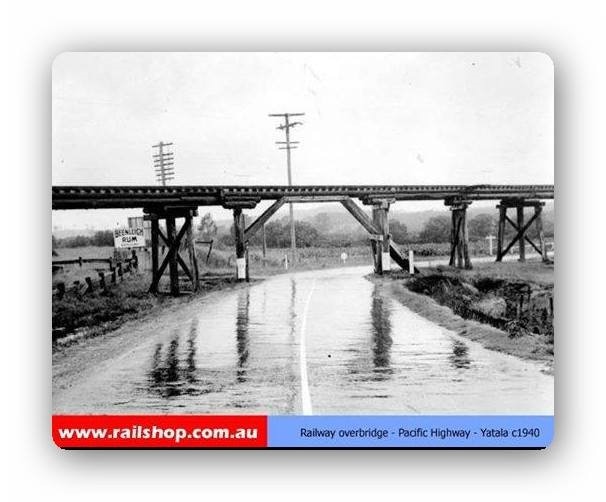
Photo left- Yatala timber trestle bridge with demolition train removing track 1965
Photo right- Road view of Yatala timber trestle bridge 1940s
Ormeau
Photo right- Road view of Yatala timber trestle bridge 1940s
Ormeau
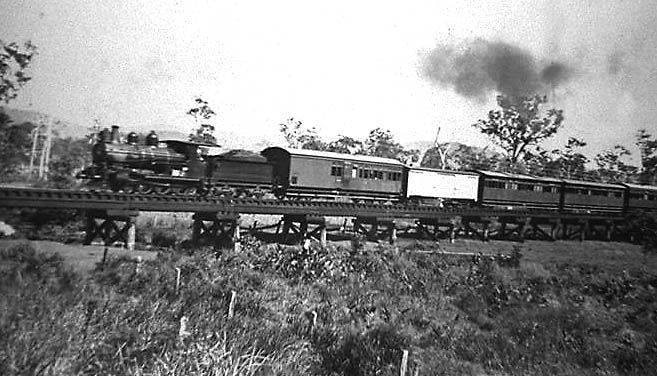
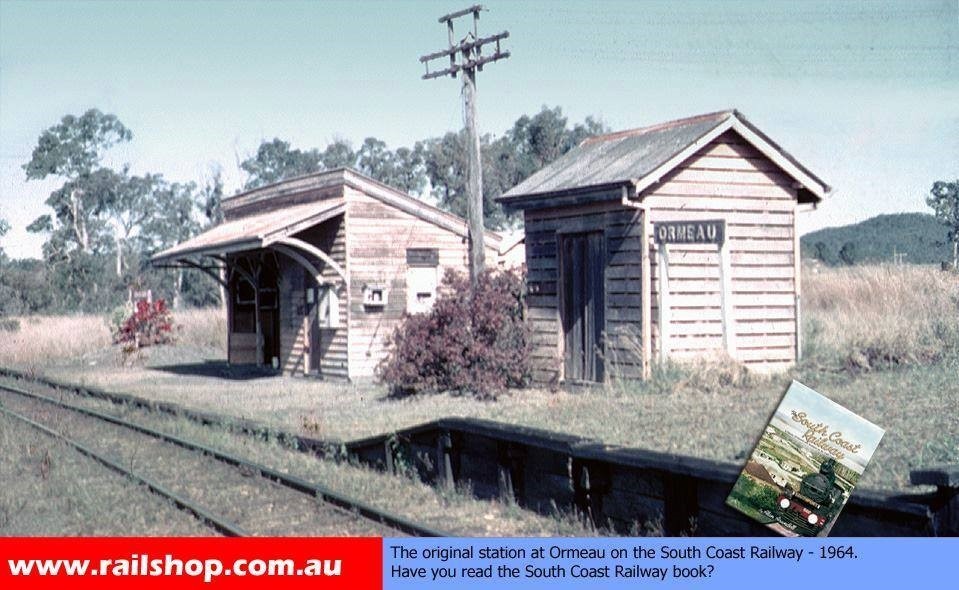
Photo left- Ormeau timber trestle railway bridge early 1900's
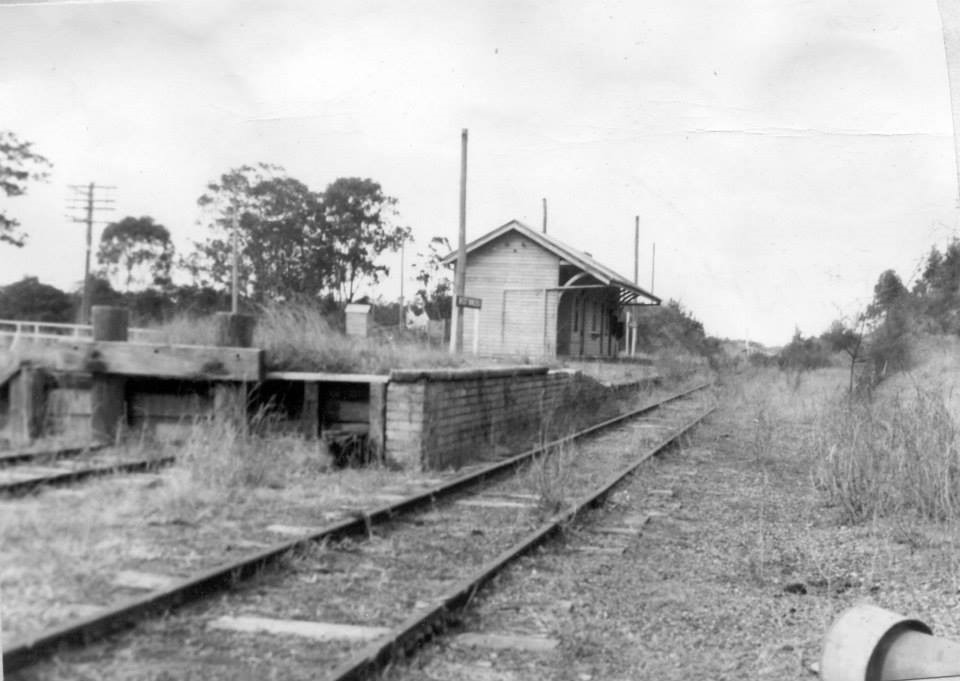
Photo right- Ormeau station 1964, just after services ceased. Buildings have not been maintained for years. Close to current Livingstone Christian College site
Pimpama
Photo right- Ormeau station 1964, just after services ceased. Buildings have not been maintained for years. Close to current Livingstone Christian College site
Pimpama
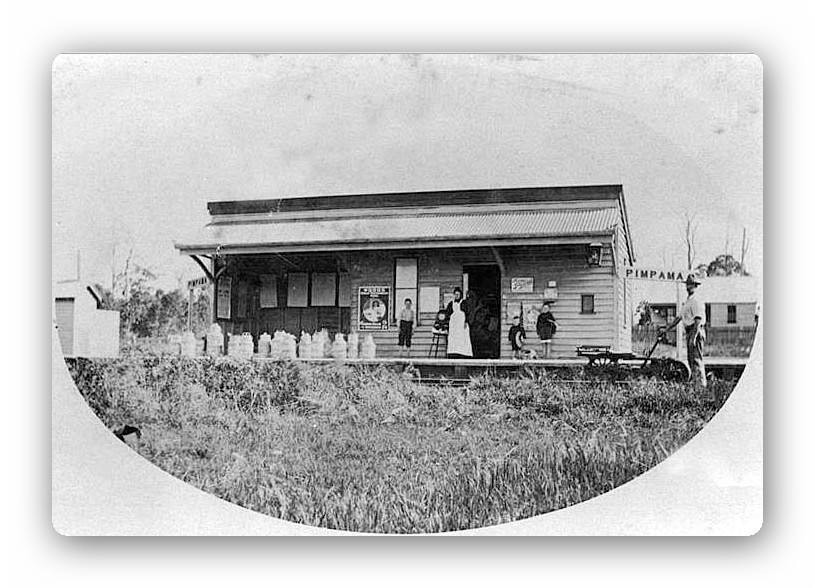
Pimpama station 1910
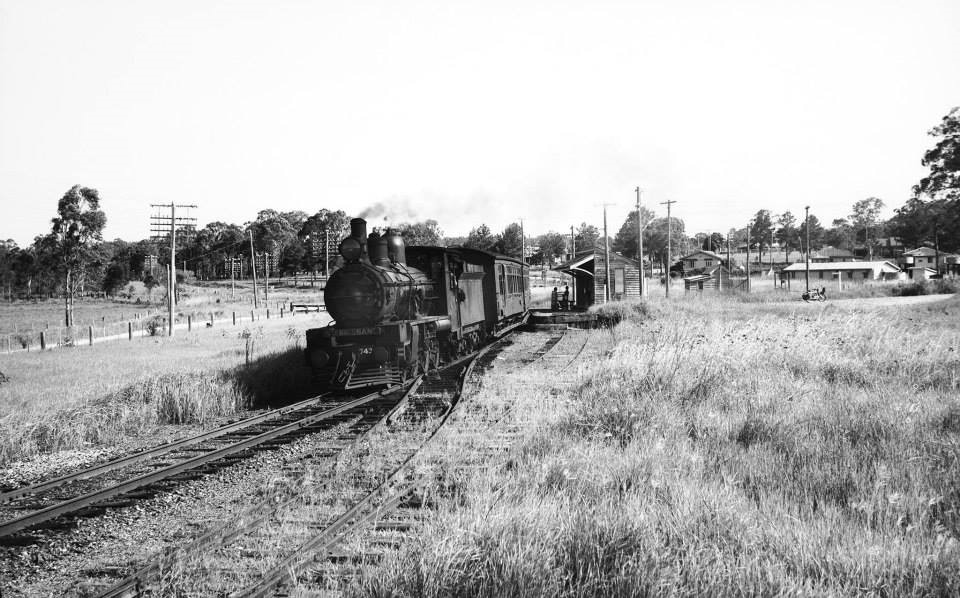

Photo left- Pimpama station in the centre, 1964, with storage siding in the foreground. Close to current intersection of Depot and Jacobs Well roads, Pimpama.
Photo right- Oaky Creek timber trestle bridge and flood plains. Close to the current Coomera Council Depot
Coomera
Photo right- Oaky Creek timber trestle bridge and flood plains. Close to the current Coomera Council Depot
Coomera
Photo left- Coomera Rail bridge. Steel centre span over water and timber trestles matching alignment to surface level. West (approx. 300m) of the current motorway crossing of the Coomera river
Photo right- View of the full Coomera river bridge steel and timber sections, 1964. View to the west
Photo right- View of the full Coomera river bridge steel and timber sections, 1964. View to the west

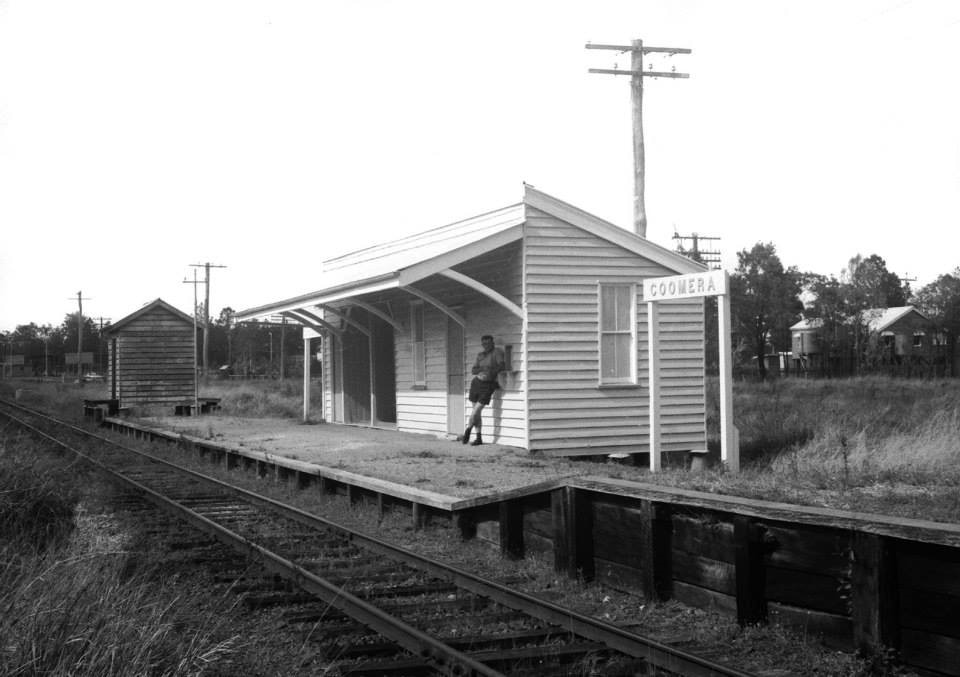
Photo left- Coomera station, 1960, with painted over name boards. Close to current Heathwood Drive in green corridor opposite Catalina drive
Photo right- Coomera station with differences in platform level for old timber coaches and newer Railmotors, 1961
Oxenford
Photo right- Coomera station with differences in platform level for old timber coaches and newer Railmotors, 1961
Oxenford
Oxenford, bridge over Pacific Highway, early 1960s. Before the station approaching from Coomera
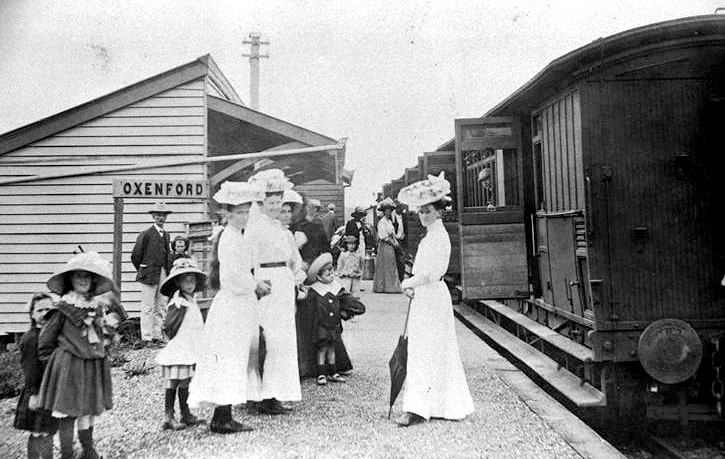
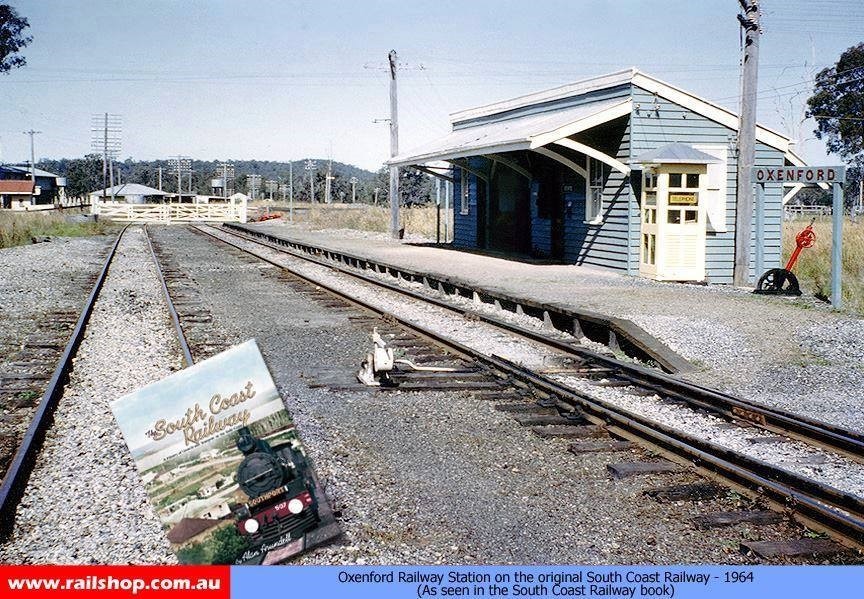
Photo left- Oxenford station early 1900's
Photo right- Oxenford station with passing loop looking towards Hope Island road level crossing. Station close to current Oxenford Tavern. Foreground reverse turnout connection to passing loop.
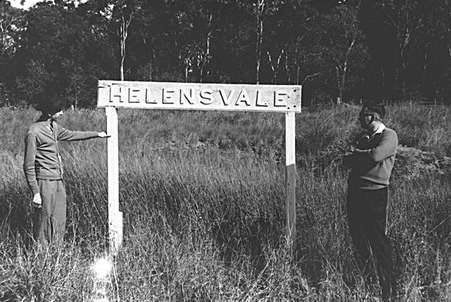
Helensvale
Photo right- Oxenford station with passing loop looking towards Hope Island road level crossing. Station close to current Oxenford Tavern. Foreground reverse turnout connection to passing loop.
Helensvale
|
Helensvale station 1960's. The low level platform was only ever a halt and never had any buildings. Helensvale was not developed even in the early 1960's. Difficult to place platform but close to Helensvale State High School in park area off Discovery Drive
|
|
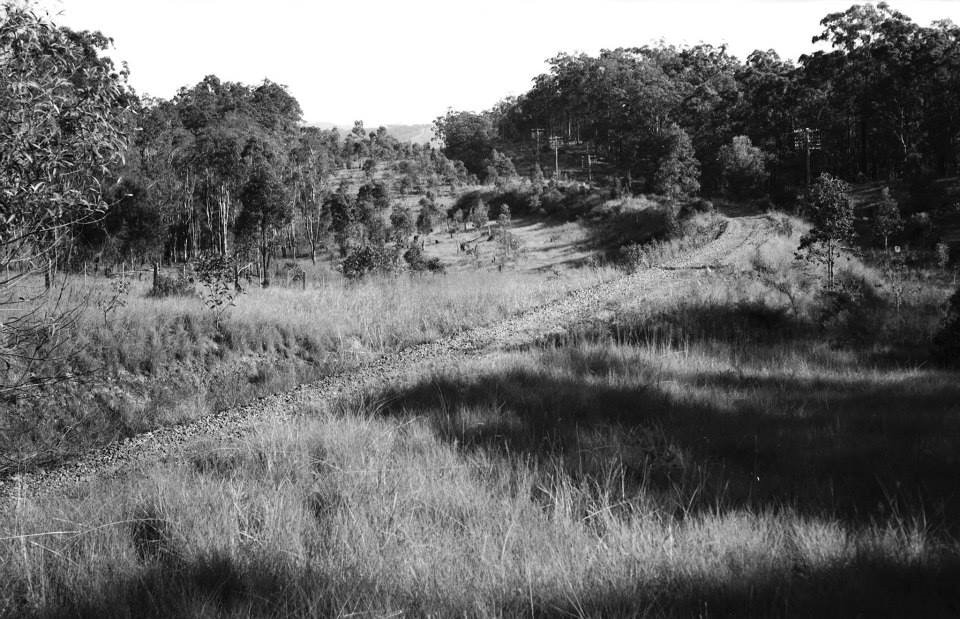
The Saltwater Creek crossing is directly south of Helensvale Homeworld, at the bend in the creek


Photo left- Coombabah Creek timber trestle bridge, 1964. South of Country Club Drive, close to the new Light Rail Crossing of Coombabah Creek
Photo right- Remaining Coombabah bridge concrete piers in the 21st century
Photo right- Remaining Coombabah bridge concrete piers in the 21st century
Formation near Coombabah Creek after track has been removed after 1965
Ernest Junction
Ernest Junction
Ernest Junction line north of the junction in the 21st century. Neither road or rail alignments exist anymore. Close to Ashmore road opposite Smith St motorway
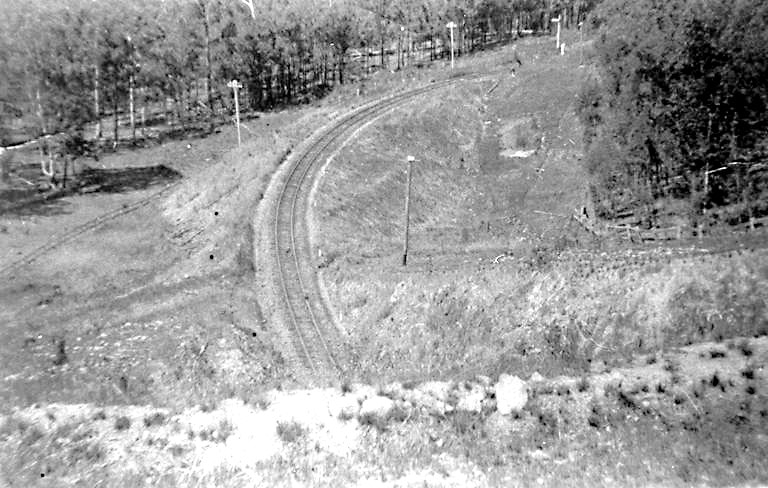

Photo left- Line north to Helensvale looking from top of Ashmore road tunnel
Photo right- View south from Railway street. Present day called Marybeth Crescent. Storage sidings in the distance
Photo right- View south from Railway street. Present day called Marybeth Crescent. Storage sidings in the distance
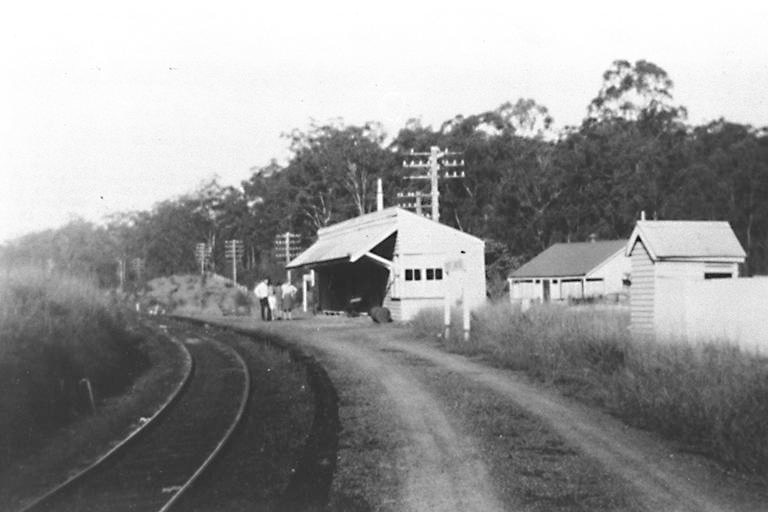
Photo left- Ernest Junction station looking from the east and Southport branch. The station is inside the junction triangle
Photo right- Close up of Ernest Junction station looking east to Southport branch
Photo right- Close up of Ernest Junction station looking east to Southport branch
Ernest Junction station inside the triangle. Train in background north to Helensvale. Train in foreground on left, south to Tweed Heads
Southport
Southport

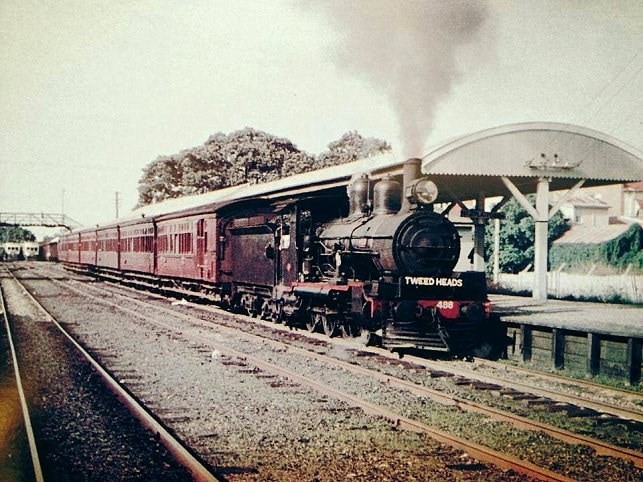
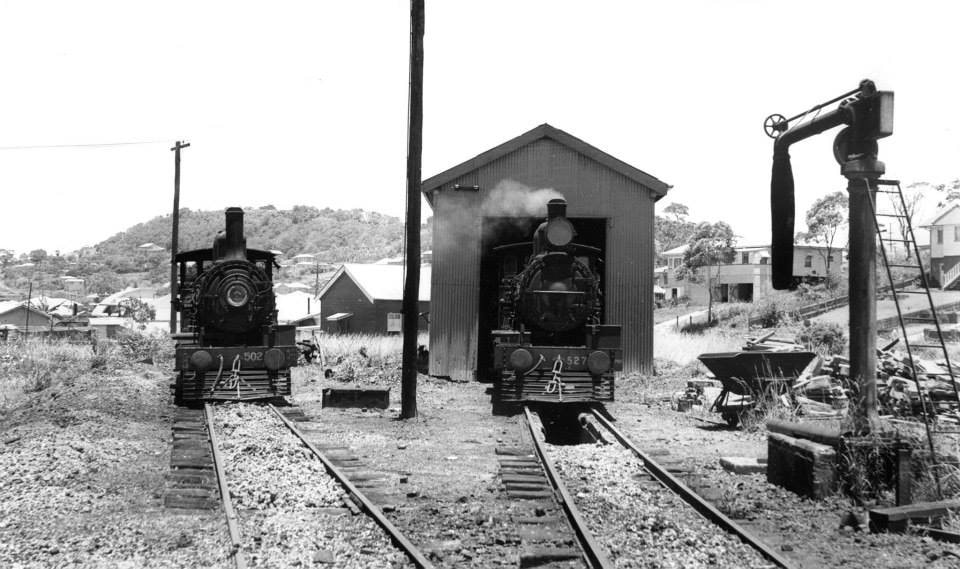
Photo left- Southport station arriving looking west. Water tower and engine shed on right. Water tower was a timber structure
Photo right- Southport station early 1960's looking east. Train departing south for Tweed heads. Footbridge in background typical Queensland Rail timber structure
Photo right- Southport station early 1960's looking east. Train departing south for Tweed heads. Footbridge in background typical Queensland Rail timber structure


Photo left- Southport station entrance from Scarborough street (southern end). Today Scarborough street is a through road with centre street parking. Present site of the CSi club
Photo right- Southport station from the northern end of Scarborough street
Photo right- Southport station from the northern end of Scarborough street
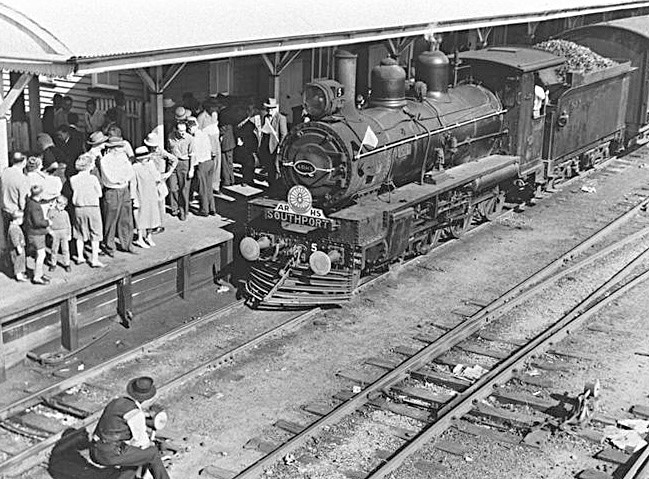
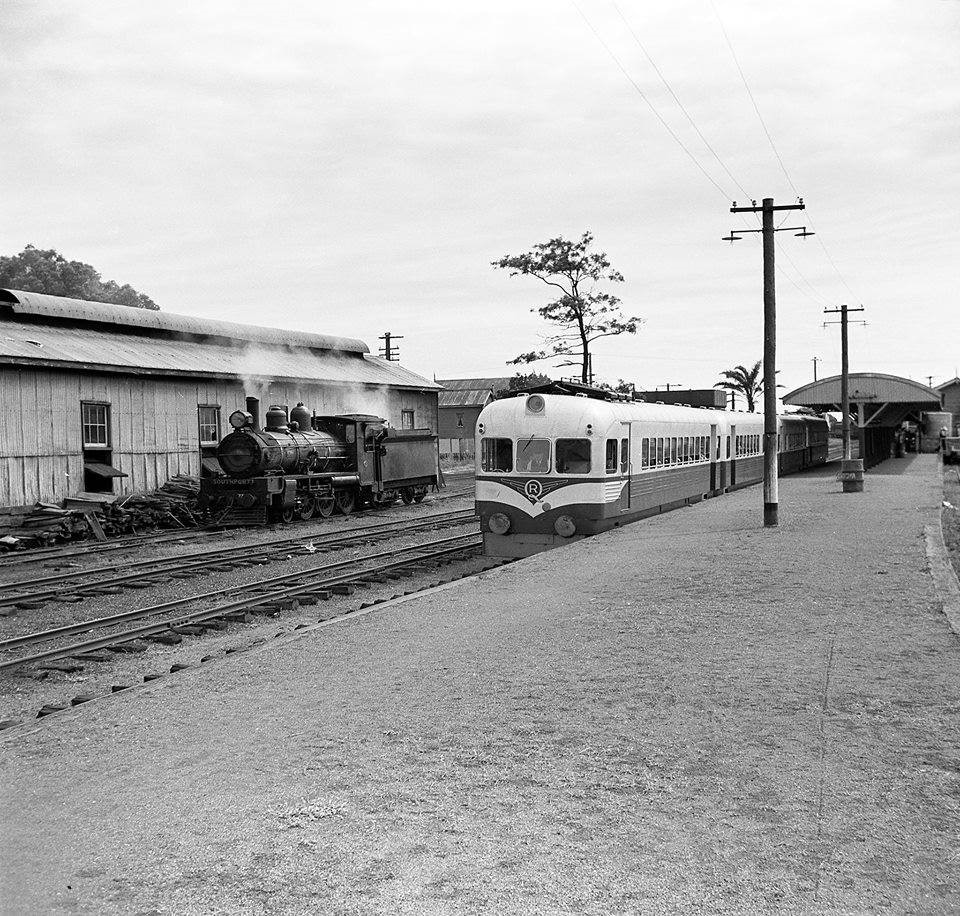
Photo left- Southport station as seen from the footbridge. Shows entry from southern side of Scarborough street. Station platform high level timber structure
Photo right- Railmotor service at Southport station 1950's
Photo right- Railmotor service at Southport station 1950's
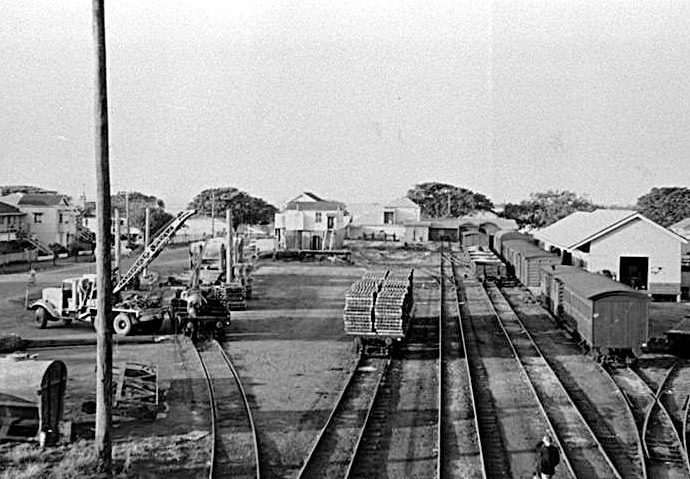
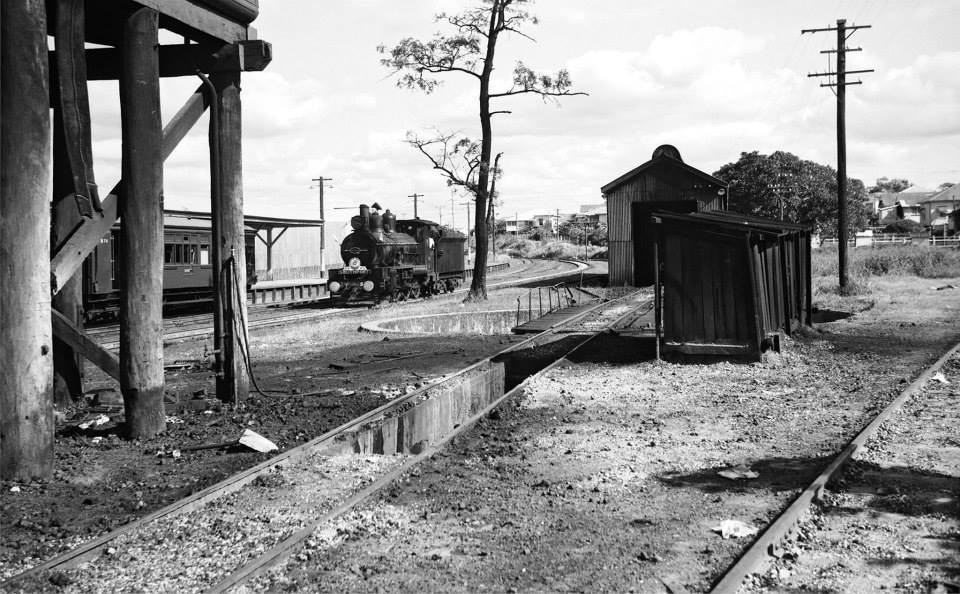
Photo left- Southport yard looking east towards the coast and Marine Parade, early 1964.
Photo right- Close up of Southport locomotive shed and yard. Water tower in the foreground left
Photo right- Close up of Southport locomotive shed and yard. Water tower in the foreground left

Photo left- Entry into Southport station yard from the south west, after High Street crossing
Photo right- Entry curve towards Southport station yard before High street crossing, after Whitby Street. Ganger on trike. Queensland Rail track alignment plans do not show Whitby street
Molendinar
Photo right- Entry curve towards Southport station yard before High street crossing, after Whitby Street. Ganger on trike. Queensland Rail track alignment plans do not show Whitby street
Molendinar
Train passing remains of Molendinar station 1964. Molendinar station was originally called Benowa. Present day location close to Ashmore Metal recyclers on Harper street
Nerang
Nerang
Nerang station, 1964, looking towards the Nerang river on left. Original township next to the river where present day buildings are located on Station street. Passing loop and original timber loading siding in the foreground. Difficult to locate Nerang station exactly, whether in the car park along Station street or the motorway access ramp or the motorway lanes themselves.
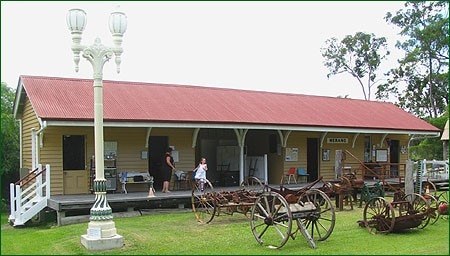
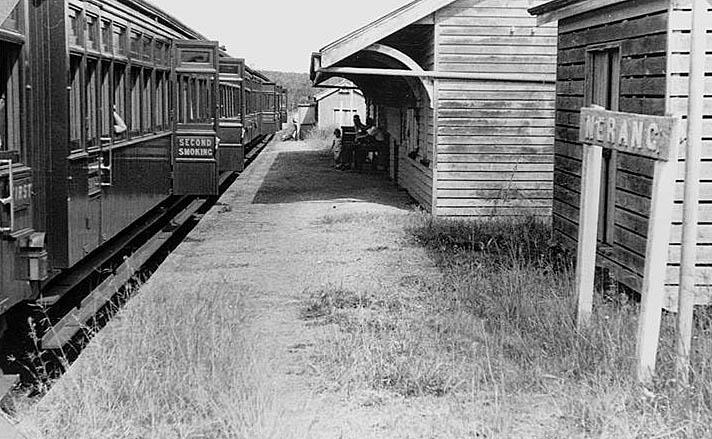
Photo left- Restored Nerang station building at Gold Coast Hinterland Heritage Museum
Photo right- Nerang station 1964 looking south
Photo right- Nerang station 1964 looking south
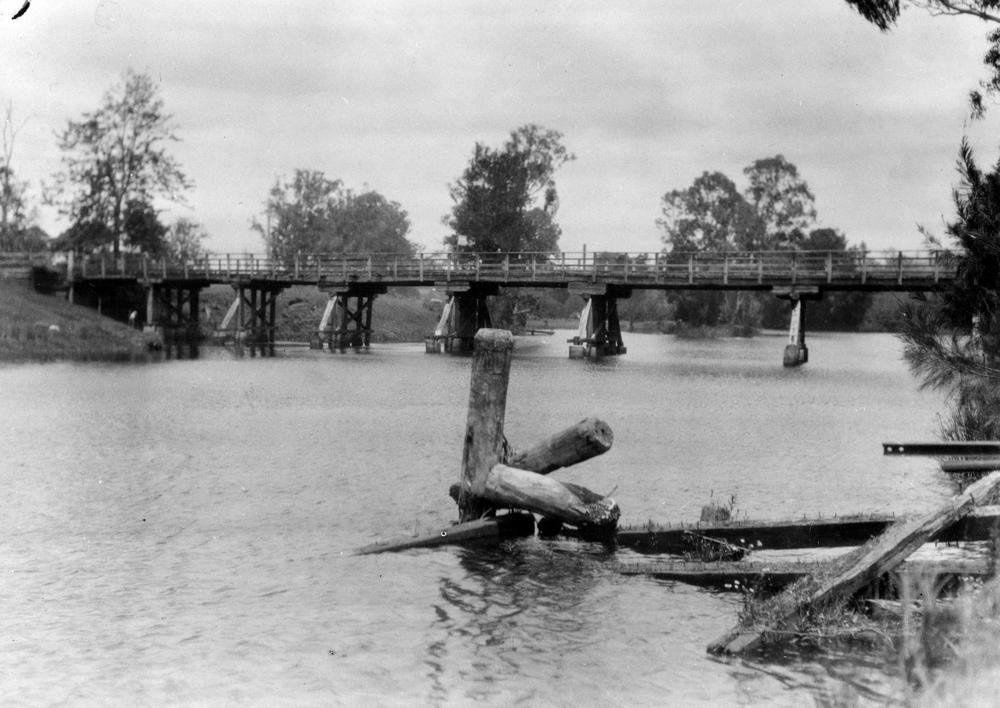
Nerang river timber trestle bridge, 1934. River crossing slightly north of the Bellara street reserve, at the end of Bosun Parade
Worongary
Worongary
Worongary station 1915
Mudgeeraba
Mudgeeraba

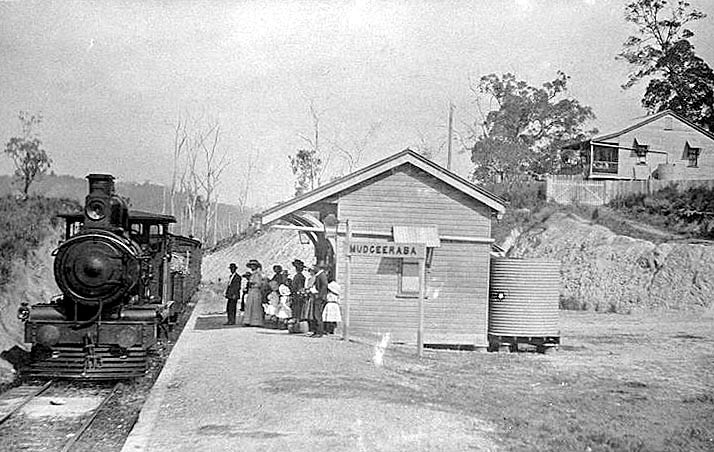
Photo left- Mudgeeraba station with passing loop
Photo right- Mudgeeraba station hill view, before passing loop constructed
Photo right- Mudgeeraba station hill view, before passing loop constructed
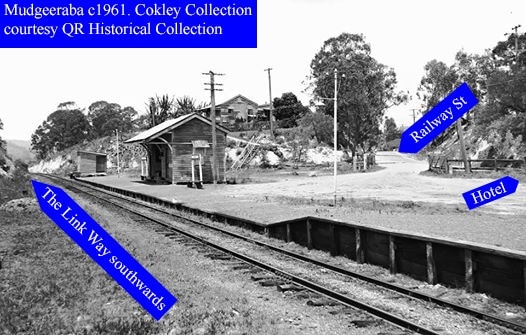

Photo left- Mudgeeraba station 1961 with passing loop removed
Photo right- Remains Mudgeeraba Creek bridge below where the southbound motorway lane now resides
West Burleigh
Photo right- Remains Mudgeeraba Creek bridge below where the southbound motorway lane now resides
West Burleigh
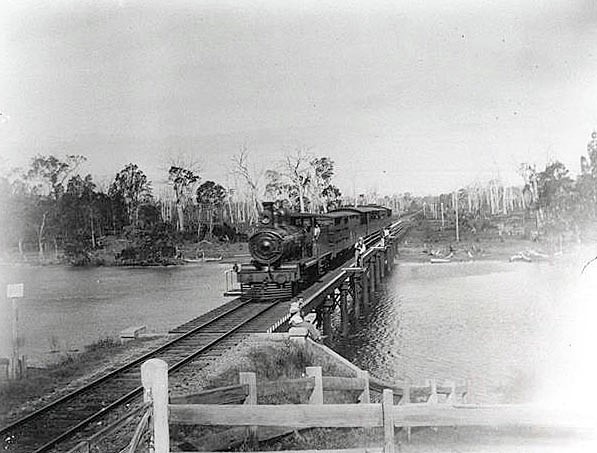
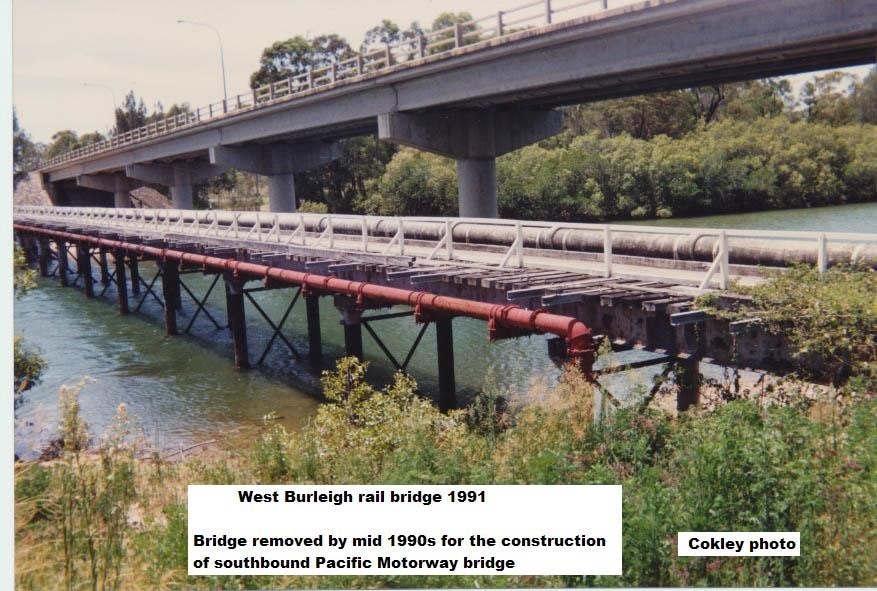
Photo left- Tallebudgera Creek Bridge
Photo right- Tallebudgera Creek rail bridge 1991, replaced by southbound motorway bridge
Photo right- Tallebudgera Creek rail bridge 1991, replaced by southbound motorway bridge

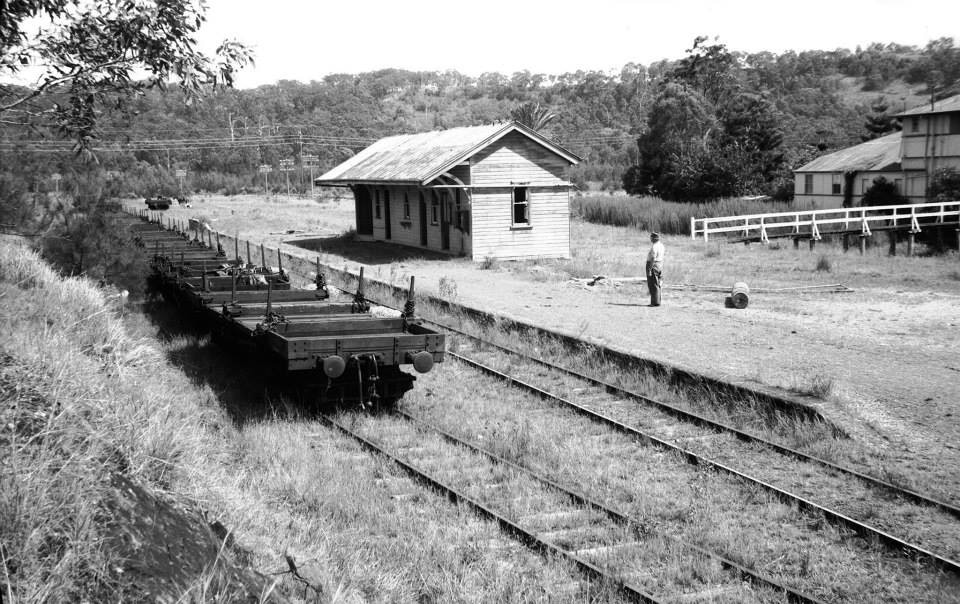
Photo left- West Burleigh station with hotel in background. Hotel replaced with modern shop/ business building
Photo right- West Burleigh station post closure in 1961. Siding located at the station. Photo taken from Tallebudgera Creek road crossing. Area between station and hotel now the motorway
Photo right- West Burleigh station post closure in 1961. Siding located at the station. Photo taken from Tallebudgera Creek road crossing. Area between station and hotel now the motorway
West Burleigh station prior to closure in 1961. Additional end platform siding with timber buffer shown

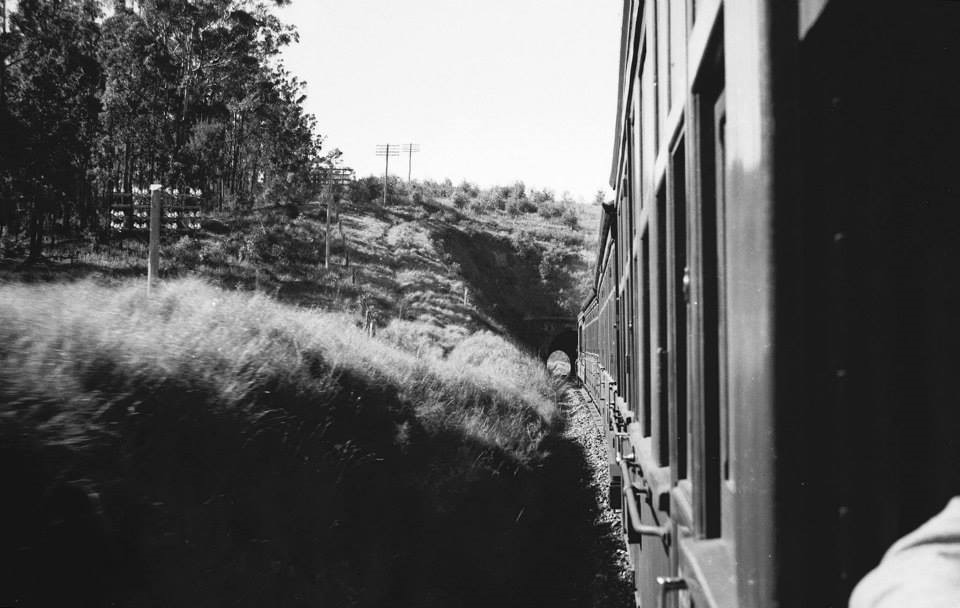
Photo left- Breakers train returning material to store at West Burleigh station looking south, 1964
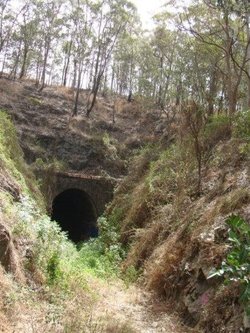
Photo right- View West Burleigh tunnel from train, 1961
Elanora
Photo right- View West Burleigh tunnel from train, 1961
Elanora
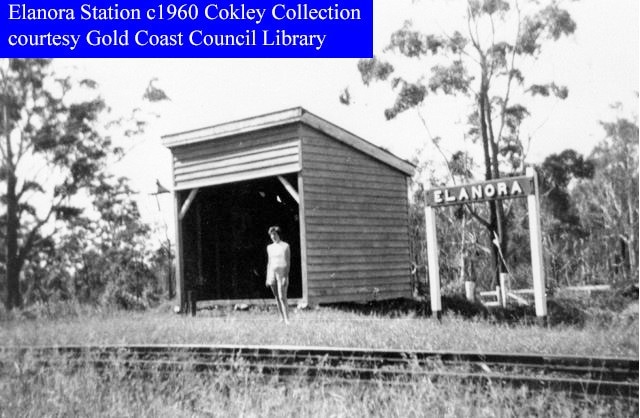
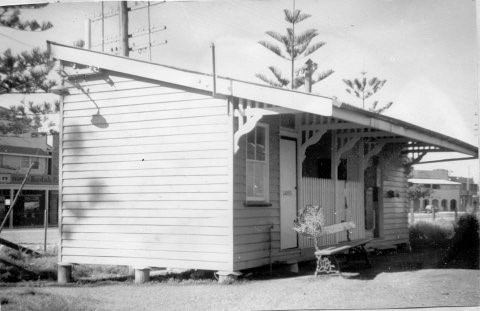
Elanora station shelter, 1960
Currumbin
Currumbin
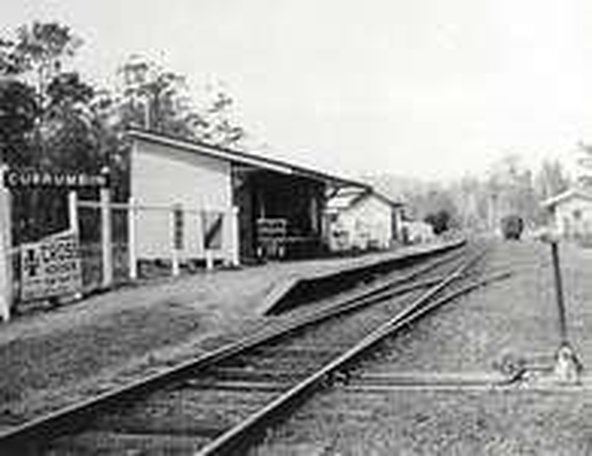
Currumbin station
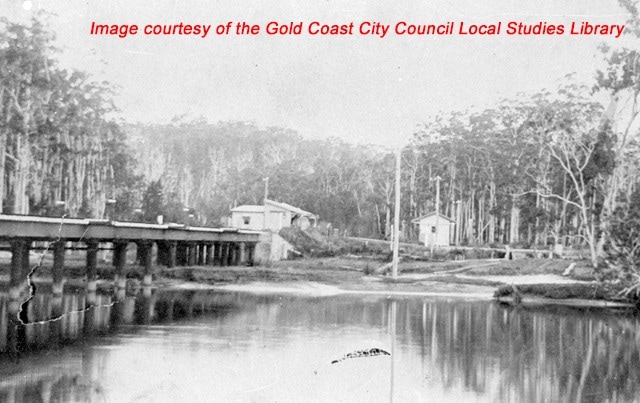
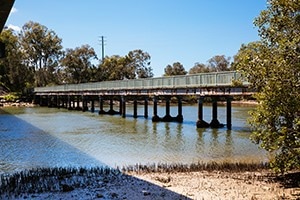
Photo left- Currumbin Creek bridge and station behind
Photo right- Currumbin Creek railway bridge in the 1990’s, which served as a footbridge till it was demolished in 2017
Tugun
Photo right- Currumbin Creek railway bridge in the 1990’s, which served as a footbridge till it was demolished in 2017
Tugun
Tugun station building
Bilinga
Bilinga
Bilinga railway siding and station shelter
Kirra
Kirra
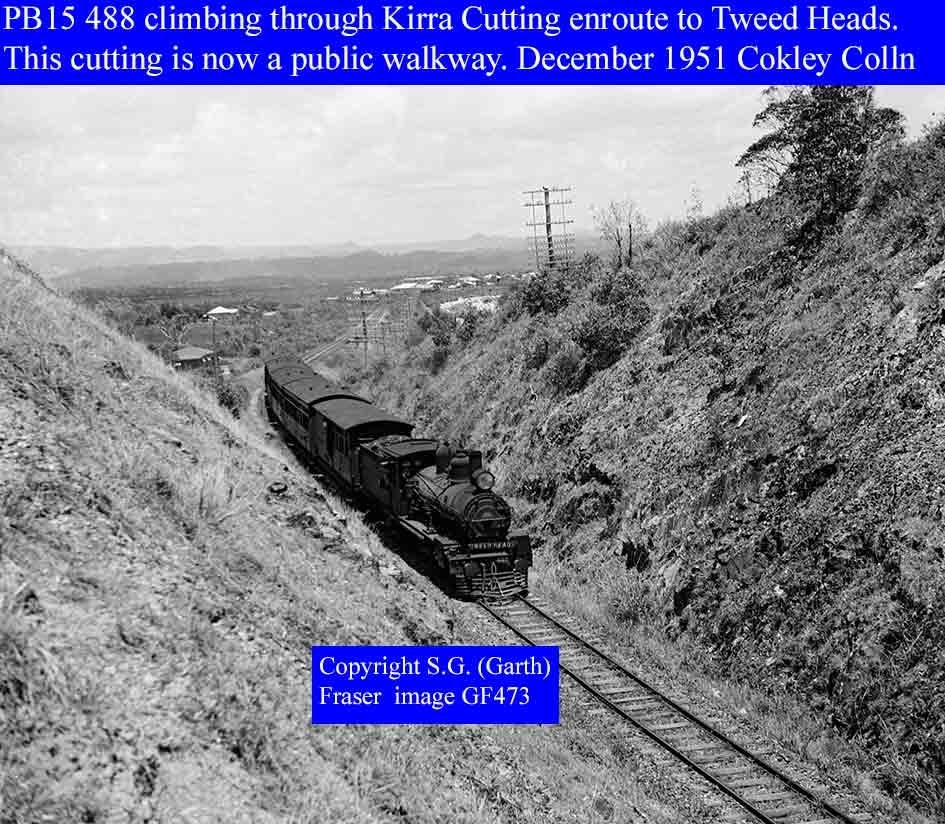
Photo left- PB15 climbing through Kirra cutting. Now filled in, Lanham Street park
Photo right- Looking along the straight towards Kirra, mid 1950’s
Photo right- Looking along the straight towards Kirra, mid 1950’s
Looking towards Kirra with timber trestle bridge over Miles St centre right
Coolangatta
Coolangatta
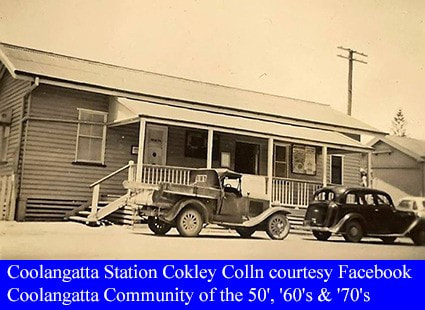

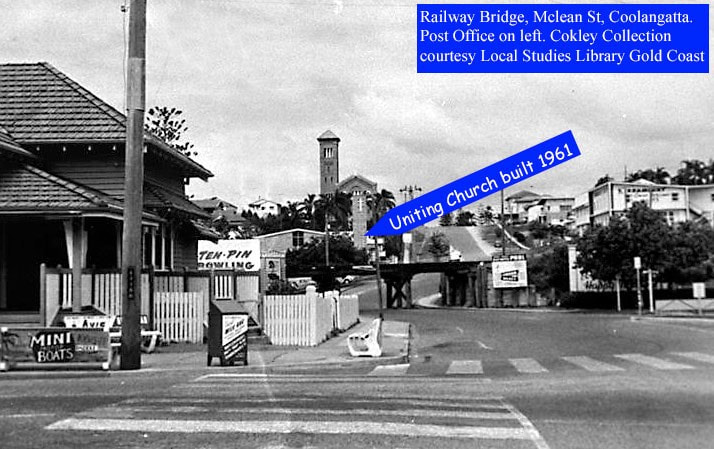

Photo left- McLean St wooden trestle bridge
Photo right- Alignment heading north from Coolangatta station with view of Garrick St to the left, 1961
Tweed Heads
Photo right- Alignment heading north from Coolangatta station with view of Garrick St to the left, 1961
Tweed Heads

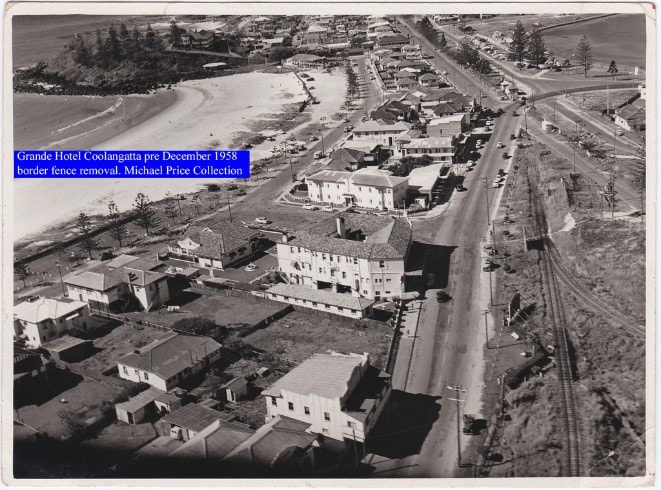
Photo left- Tweed Heads station and shunting yard
Photo right- Tweed Heads triangle dead end, with cattle yard centre right, 1958
Photo right- Tweed Heads triangle dead end, with cattle yard centre right, 1958

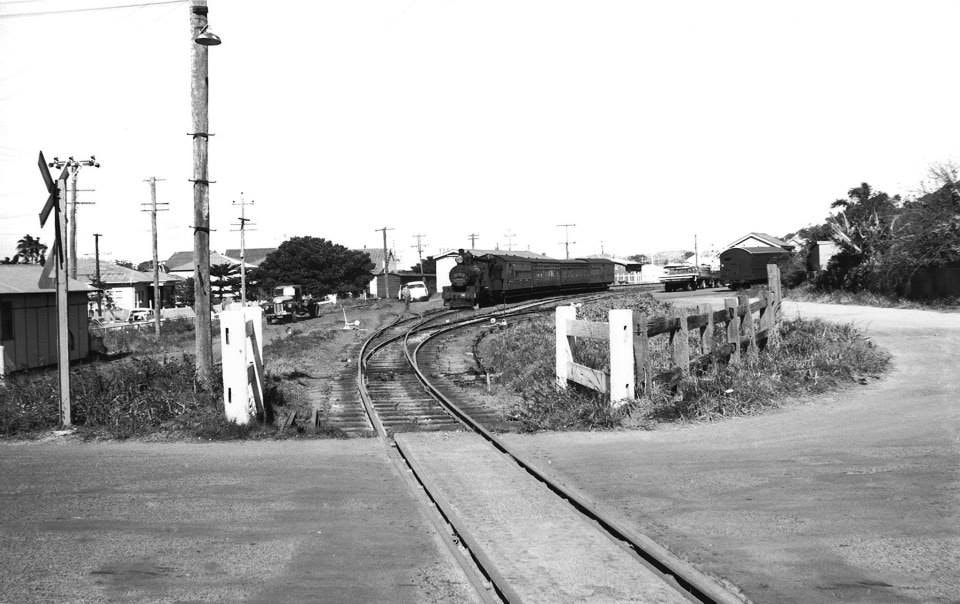
Photo left- Tweed Heads triangle with Coolangatta top left and train heading to Tweed heads station towards camera
Photo right- Tweed Heeds station from Frances Street level crossing 1961
Photo right- Tweed Heeds station from Frances Street level crossing 1961
Tweed Heads loco depot 1961 before closure. Past Frances Street that is now housing